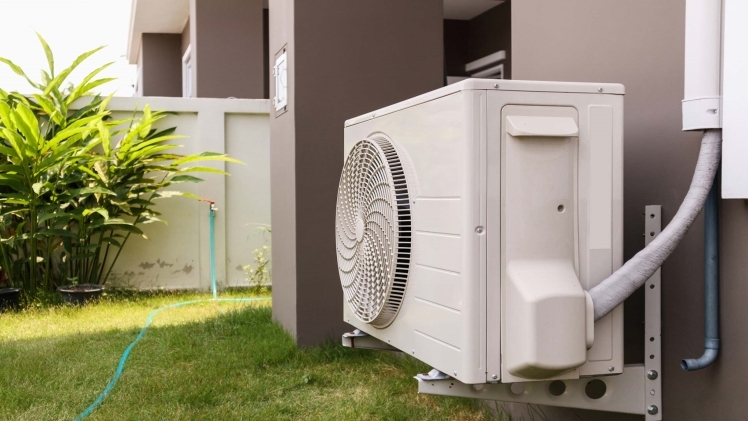
As the scorching heat of summer approaches, your air conditioning (AC) system becomes an indispensable ally in maintaining comfort in your home or office. However, regular maintenance is essential to ensure that your AC system operates efficiently throughout the season. AC maintenance not only prolongs the lifespan of your unit but also helps conserve energy and lower utility bills. This comprehensive guide will walk you through a step-by-step process to maintain your AC system effectively, ensuring optimal performance and comfort.
Step 1: Schedule Regular Inspections
The first step in AC maintenance is to schedule regular inspections. Ideally, you should have your AC system inspected by a professional HVAC technician at least once a year, preferably before the start of the summer season. During the inspection, the technician will assess the condition of various components, such as filters, coils, fins, and ducts. They will also check for any signs of wear and tear, leaks, or other issues that may affect the performance of your AC system.
Step 2: Clean or Replace Air Filters
Clean air filters are crucial for maintaining the efficiency of your AC system. Over time, air filters can become clogged with dust, dirt, and other debris, restricting airflow and reducing the system’s efficiency. Depending on your filter type, it may need to be cleaned or replaced regularly. Disposable filters typically must be replaced every 1-3 months, while reusable filters can be cleaned with water or a vacuum cleaner.
Step 3: Clean the Evaporator and Condenser Coils
The evaporator and condenser coils of your AC system can accumulate dirt and debris over time, hindering heat transfer and reducing efficiency. To clean the coils, start by turning off the power to the AC unit. Then, use a soft brush or vacuum cleaner to remove any visible dirt and debris. For stubborn dirt and grime, you can use a commercial coil cleaner. Be sure to follow the manufacturer’s instructions carefully and avoid using harsh chemicals that could damage the coils.
Step 4: Straighten Coil Fins
The aluminum fins on the evaporator and condenser coils can easily become bent or misaligned, obstructing airflow and reducing efficiency. To straighten the fins, use a fin comb or a butter knife to gently comb them back into place. Be careful not to apply too much pressure, as this could cause further damage to the fins. Once the fins are straightened, you should notice improved airflow and efficiency in your AC system.
Step 5: Clear the Condensate Drain
The condensate drain removes excess moisture from your AC system. Over time, it can become clogged with algae, mold, and debris, leading to water leaks and potential water damage. To clear the condensate drain, locate the drain line near the indoor unit and use a wet/dry vacuum to suction out any blockages. You can also use a mixture of bleach and water to disinfect the drain and prevent future clogs.
Step 6: Check Refrigerant Levels
Refrigerant is the substance responsible for cooling the air in your AC system. If your AC system is low on refrigerant, it will have to work harder to cool your home, leading to increased energy consumption and higher utility bills. During the annual inspection, the HVAC technician will check the refrigerant levels and top off the system if necessary. If you notice any signs of a refrigerant leak, such as hissing sounds or ice buildup on the coils, be sure to contact a professional technician immediately.
Step 7: Inspect and Seal Ductwork
Leaky ductwork can lead to wasted energy and reduced efficiency in your AC system. During the inspection, the technician will inspect the ductwork for any signs of leaks, holes, or disconnected joints. They will also check for proper insulation and sealing. If any issues are found, the ductwork can be repaired or sealed using duct tape, mastic sealant, or metal tape.
Step 8: Calibrate Thermostat
A properly calibrated thermostat is essential for maintaining a comfortable temperature and maximizing energy efficiency. If your thermostat is not calibrated correctly, it may inaccurately read the temperature, causing your AC system to cycle on and off more frequently than necessary. A thermometer is used to compare the temperature reading on the thermostat to the actual room temperature to calibrate the thermostat. If there is a discrepancy, follow the manufacturer’s instructions to adjust the calibration settings accordingly.
Step 9: Trim Vegetation around the Outdoor Unit
The outdoor unit of your AC system requires adequate airflow to operate efficiently. Overgrown vegetation, such as bushes, shrubs, and trees, can obstruct airflow and reduce the system’s efficiency. To ensure proper airflow, trim any vegetation around the outdoor unit, leaving at least 2 feet of clearance on all sides. This will allow for optimal airflow and help prevent overheating and system breakdowns.
Step 10: Schedule Professional Maintenance
While you can perform several DIY maintenance tasks to keep your AC system running smoothly, it’s also important to schedule professional maintenance regularly. A qualified HVAC technician can identify and address potential issues before they escalate into costly repairs. By investing in professional maintenance, you can prolong the lifespan of your AC system, improve energy efficiency, and ensure consistent comfort throughout the year.
Conclusion
AC maintenance is essential for keeping your system running efficiently and effectively. By following the step-by-step guide outlined above, you can prolong the lifespan of your AC system, lower utility bills, and enjoy optimal comfort in your home or office. Remember to schedule regular inspections and maintenance with a qualified HVAC technician to ensure that your AC system continues to perform at its best for years to come. With proper care and maintenance, you can stay cool and comfortable even during the hottest days of summer.

